Trekking, Landscape and Travel Photography in Peru – A Brief Report
Hi guys! In this content, I will share some of my experience on the trip I took to Peru, in May 2022. If you enjoy landscape photography, travel photography, deeper experiences and a lot of adventure, this is certainly the place for you.
Let's break the content down into a few important sections. Each one of them would deserve a unique approach, but we will expand some of them further in the future and as per your requests.
Ideal Season
Although Peru is a large country with several microclimates, there are two seasons that mark the traveler's calendar: the dry season and the rainy season. Numerous guides warned us of the rainy season on various trails and places we visited and that things get a little more “complicated”, if we can say so.
Then:
April to September – Dry Season – Winter
October to March – Rainy Season – Summer
As we said earlier, we went in May as we thought it would be the perfect combination of dry, sunny weather and not so intense cold. If you go to the mountains, you should also pay attention that June, July and August are the height of winter. In our case, we only caught a brief shower before heading up to Laguna Humantay. The rest of the days were dry and sunny as predicted.
Altitude
This is the first thing everyone thinks about before traveling to Peru. Altitude is an issue for some people, and obviously you should keep this factor in mind before planning and traveling.
There are several ways to dodge the effects. I'll tell you what I did, not necessarily being a guide for you to follow either. Always remember to consult a professional to know exactly what you can and cannot do.
In my case, I have been training for a few years in the morning to improve my physical and cardiac conditioning. Nothing special or too demanding, but always trying to challenge a little with each workout. I highly recommend the Freeletics app if you want to start this journey alone.
Other VERY important things for me were:
Adequate and light food, especially a few days before and at the beginning of the trip;
Good hydration;
I avoided alcohol a few days before and at the beginning of the trip;
Good sleep;
As expected, I didn't suffer the famous Soroche, or Altitude Sickness in the first few days and I was fully acclimatized in the following days. I'll talk about that later.
Acclimatization
Having just landed in Cusco, the body begins to try to adapt to the scarcer oxygen. I didn't feel anything at all when I got off the plane, but you feel a little more tired going up stairs, hills and talking constantly. Nothing crippling, but it can be annoying if you're not feeling well.
Altitude has different effects on different people, so caution is in order. Some things I did to acclimate carefully were:
First day: Hiking in the city itself. If you are comfortable, you can even risk a few slopes and stairs or stretch the route a little. Hydrate yourself. Eat light. Sleep well.
Second day: We went to the Sacred Valley to do a full day tour of the main attractions (details below). The Sacred Valley is lower, and if you link it with some LIGHT walks it can help a lot in your body's natural process. Always take a water bottle (600ml or 1l) with you.
From the third day we started our trails without major problems.
Mobility
We always make our trips by renting cars and going independently to places. In Peru the strategy was different. Why?
Traffic in Peru is quite chaotic and the roads are not always in an ideal condition. In addition, many places were quite far away, in remote locations or on trail routes that were not round-trip. Many blogs recommend not driving in Peru because of these factors.
To avoid stress and focus energy on what was most important, we hired guides for the main attractions and trails. The transfer was quite large in some, and we even took the opportunity to rest on the way (round trip).
You can even try to rent a car or plan everything yourself, but you can put a few points on the challenge scale in that case. I would not recommend.
Itinerary
After the basic care, let's talk a little about the division of our trip:
First two days – City exploration (Cusco) and Sacred Valley
Third to seventh day – Salkantay Trail
Eighth day – Rest
Ninth to Eleventh Day – Trip to Lake Titicaca
Twelfth day - Rest
Thirteenth and Fourteenth – Palccoyo and Ausangate Mountains
Fifteenth day - Rest
Sixteenth day – Archaeological visits in Cusco
Seventeenth day – Trail to Wakrapukara
Eighteenth day - Rest
Nineteenth day – Return to Brazil
If you understand our itinerary well, it has a lot of rest days, especially before and after doing the trails. Do not doubt the power to put a day for you to do absolutely nothing. Reload. Eat well. Solve things that can get in the way (dirty clothes, buy some equipment, fix unforeseen events). This is critical if you want to go far and well.
We were going to do the 5-day itinerary through the Ausangate Mountains, but we got the news that the Rainbow Mountains were closed, which ended up frustrating our plans. As we weren't sure how we would feel after Salkantay, we ended up opting for shorter routes and a few extra days of rest.
If I could choose again, maybe I would do the 5 days of Ausangate itinerary, knowing that I managed to overcome the altitude well. But, caution is always critical for you not to get in hand, especially on a first time. We'll talk about trails and locations in future content.

Equipments and Photographic Opportunities
If you are a photographer like me, you must have done some backpacking trips. Large filters, tripod, three different lenses. We need to talk here.
It is possible that you will have to make some choices during your trip. Maybe a bottle of water will be worth more than that lens that you will only use in three photos of the five hundred you will take. Maybe a lighter backpack will take you further and better than going all dressed up and climbing up to 4600m.
Make smart choices.
I mostly took my Canon EOS R with a pretty versatile lens in the body (24-105mm f/4). If you have a 24-70mm it's a great choice too. Don't take more equipment than you can carry! After all, if you stand by the way your camera won't walk up the mountain. Bring stuff to support YOU, not your camera and photos. Take lightweight, portable filters. This is where you'll need to be creative and show your real skills.
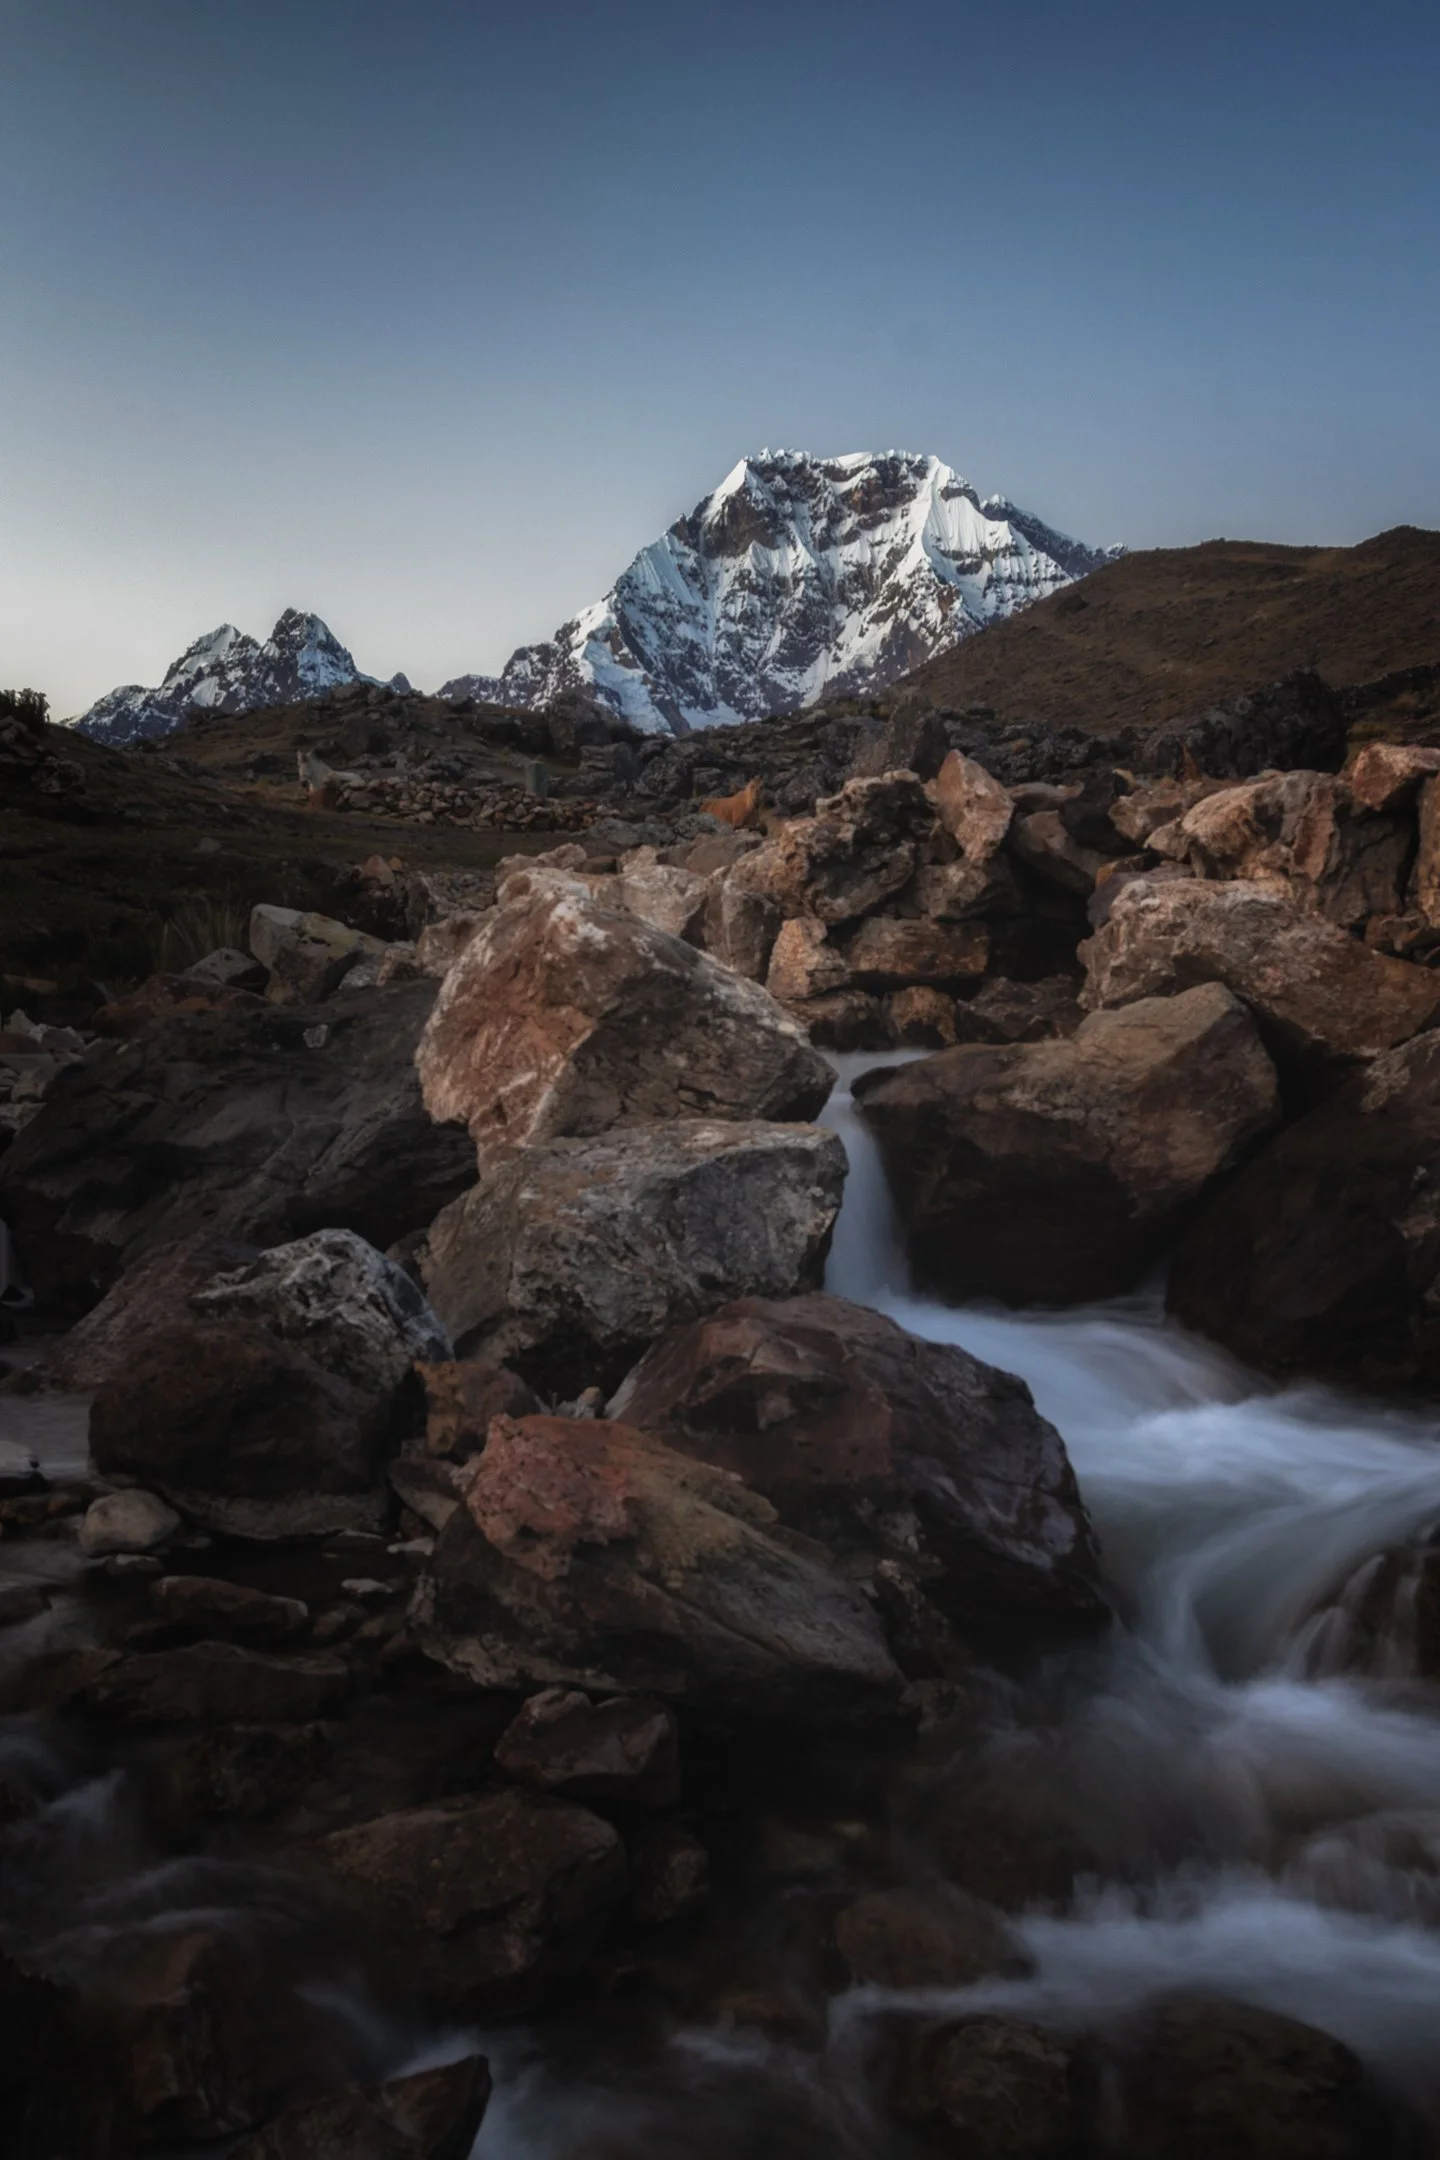
There are several photo opportunities near the mountains. Local animals, compositions with the stones, rivers, waterfalls, golden hours... we will talk about them in the future contents of each of the locations.
Another detail is that you will need to step out of your comfort zone a little in terms of doing things you would do on short trails, or parking close to what you are going to photograph. At times you may even forget to pull out the camera because of tiredness, hunger, etc. So be resilient!
Experiences
This trip was amazing to get out of the traditional Landscape Photography box. Being immersed in cultures, peoples, scripts where you need to walk for days on end is quite challenging to expand awareness and use photography as a tool to communicate the world to the world.

I've always been very focused on showing the beauty of countless landscapes, but sometimes you start to go through a very narrow tunnel of reality and do the same things as everyone else (go to the same places, use exaggerated effects on photos).
Here is a trip where you will breathe nature. You will interact with people you never thought existed. You'll learn things to tell stories with the images... If it's not your vibe, that's fine! But, it's good to be warned not to be disappointed. If so, you will have the most incredible experiences through overcoming, fraternization and friendship.
As I publish the contents of each location, I go deeper into the photos, techniques and experiences. In this one I wanted to give you more general coverage of what you can expect and do to have a great trip.
Until next time!